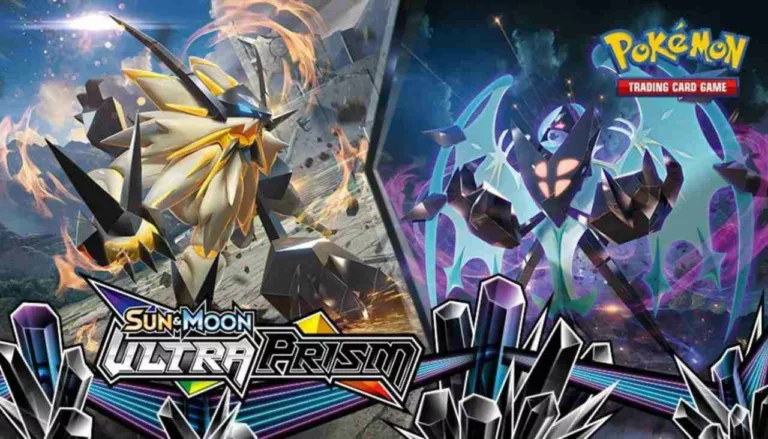
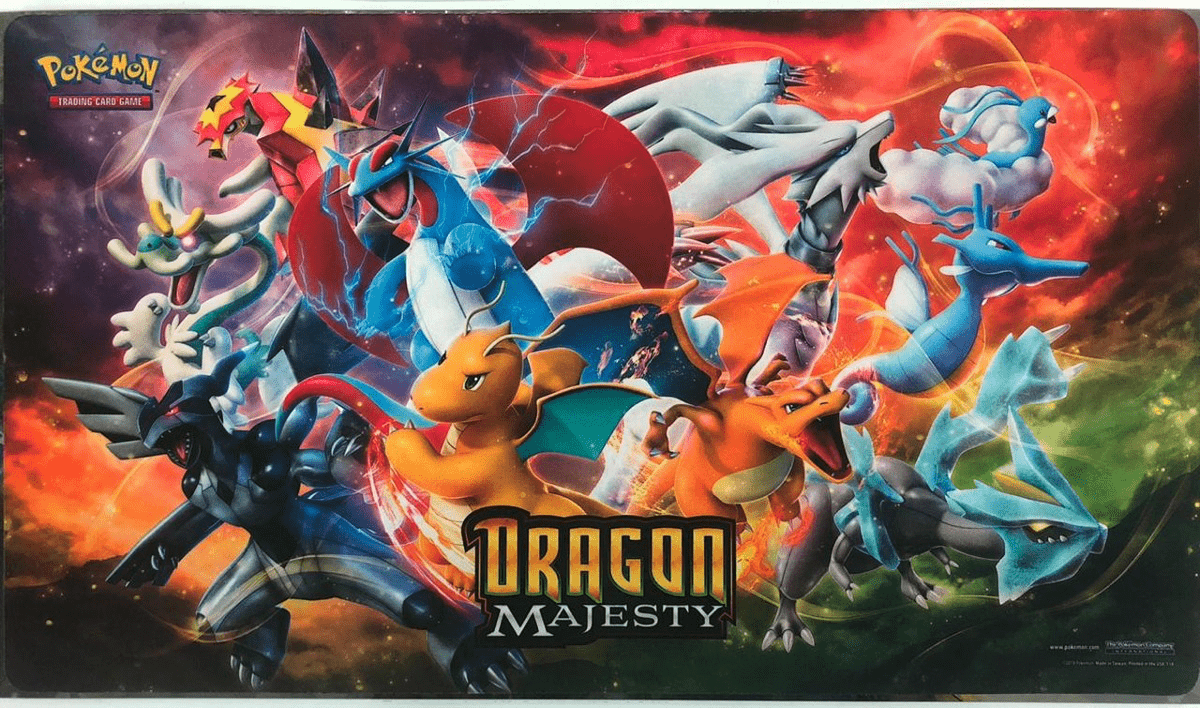
Rotation Guide 2020 Part 4: Dragon Majesty, Promos and Lost Thunder
Hello everyone, and welcome back to part 4 of my guide to this year’s rotation. Today, to celebrate the recent rotation taking effect, we’ve got a bumper edition! We’ll be covering the mini-set Dragon Majesty, the Sun and Moon Promo cards, and the first half of the final set to rotate, Lost Thunder. Let’s dive in!
Victini Prism Star

Another great Prism Star Pokémon, Victini was great at recovering energy cards from the discard pile while scoring big OHKOs on high HP opponents. It’s two most popular partners, Baby Blacephalon and Reshizard, required high amounts of energy to attack, meaning that them being knocked out only fuelled Victini’s Infinity attack even more. After hitting big numbers with its attack, the energy would be ready to go again thanks to the like of Giant Hearth, Fiery Flint and Welder.
Quagsire

Also helping out with energy, Quagsire’s speciality was being able to make sure that you could always have a powered-up attacker. After an unsuccessful relationship with Lapras GX, Quagsire formed a formidable partnership with Naganadel, whose ability to accelerate to itself from the discard pile was used to great success to power up attackers in a single turn, all while ensuring you never ran out of energy.
Altaria GX

Primarily used for its Sonic Edge attack, Altaria was useful in Welder Mewtwo in dealing with another Sonic Edge user, Keldeo GX, who could completely wall all other GX Pokémon thanks to its ability. However, with Keldeo completely dropping off in play after being dropped in favour of Zacian V to partner ADP, Altaria GX was no longer needed.
Turtonator

Since Explosive Jet synergised so well with Welder, Turtonator was played in a wide variety of Welder decks for its late game burst potential. High HP Pokémon such as Mew3, Reshizard and Heatran GX requiring lots of energy throughout a game, you could play down a Turtonator with a Welder and detonate a TagTeam Pokémon with ease thanks to your other powered up attackers.
Fiery Flint

Probably the biggest card from this set to be rotating out, Fiery Flint was first played with Reshizard, before being replace by Giant Hearth to ensure energy for Welder. However, as well as this new Stadium, Fiery Flint was paired with Baby Blacephalon to form one of the most popular (and, at the same time, unpopular) archetypes in the game. With 1 Fiery Flint, you were only a Giant Hearth or Energy Retrieval away from being able to score a knockout on any Pokémon in the game.
Lance Prism Star

A powerful Supporter on paper, Lance Prism Star was, unsurprisingly, used to search out Stage 2 Dragon types with powerful abilities. These were mainly the two Dragonite cards from Team Up and Unified Minds, which allowed you to search out Supporter cards from the deck, and accelerate additional energy, respectively.
Switch Raft

Switch Raft was another great card in theory, providing some free healing since almost all decks played Switch anyway. However, since none of the universally played Pokémon (Jirachi, Dedenne GX etc.) were Water type, meaning that if you played this card you opponent could gust and trap any of your non-attacking Pokémon that were of a different type. A shame, really, considering that healing 120 damage for free is something that doesn’t come around very often…
Lucario GX

The first of 3 significant Promo cards which rotate out this year, Lucario GX’s peak was with the other great Fighting type GX cards, and Zoroark of course. It was paired in a variety of ways with Buzzwole GX and Lycanroc GX to take sudden quick knockouts with Aura Strike, or finish of a big threat with a Cantankerous Beatdown GX, an attack which also saw Lucario GX feature in some Ultimate Mewtwo varients.
Solgaleo GX

Speaking of Mewtwo and Mew GX, Turbo Strike was (along with Welder), the main way of accelerating energy in the fire-based builds of the deck. Finishing your first turn with 5 energy on the board was great when a lot of your attackers required numerous energies in their attack cost. Also, it could be used to reload energy onto your Pokémon towards the late game, all while doing a significant amount of damage. The loss of Solgaleo GX is so big to Welder Mewtwo, that it probably signals the end of the archetype altogether.
Dusk Mane Necrozma

A nice one prize option, Dusk Mane Necrozma was great at finished off damaged GX Pokémon on your opponent’s bench for game. With Zacian V (its most popular partner) unable to OHKO a TagTeam Pokémon in one hit, Dusk Mane Necrozma offered a nice, low risk option that could lead you to taking multiple prizes per turn thanks to the Jirachi Prism Star combo.
Meganium

It’s sort of a cliché nowadays that the only way a Stage 2 Pokémon will see play is if it has an absolutely crazy ability. Meganium is a perfect example of that cliché, as Quick-Ripening Herb is so powerful that it would be kind of unfair if it was printed on anything other than a Stage 2 Pokémon. It paved the way for 2 crazy decks centred all around these evolution Pokémon, with Swampert providing the draw, and either Greninja GX or Nidoqueen supplying the firepower. With Meganium now rotating, it’s now back to Rare Candy for the rest of the Stage 2 cards left, with no chance of any other support in sight…
Skiploom and Jumpluff


Next up, we have Sun and Moon’s take on Night March, a deck built around low HP Pokémon who had potential to deal massive damage. This version, built around the Lost March attack, required you to put you Pokémon in the lost zone instead of the discard pile in order to power up the attack. However, while the deck saw some success, getting Skiplooms into the lost zone required you to evolve into it, something that was never going to be as easy as simply discarding it from you hand (or the deck as Night March could!). With the Sword and Shield variant, Mad Party, back to requiring Pokémon in the discard, there could be life in this type archetype yet.
Shuckle

Fresh Squeezed, a Battle Compressor for Energy cards, Shuckle as it happens never saw play with one of the most prominent energy accelerators of the SUM era in Malamar. Perhaps this was because it risked players missing early attachments, but it didn’t stop Shuckle seeing play in decks that needed lots of discarded energy early on. Namely, it was key in Alolan Exeggutor, which needed many different types of energy to be discarded, and Boltund V, which wanted to use Zeraora GX’s Full Voltage GX to get up to 8 energy on board at the end of your first turn.
Shuckle GX

Meanwhile, Shuckle GX was much more focussed towards stalling archetypes, namely Regigigas Hoopa. The ability to completely wall Pokémon who didn’t require lots of energy to attack could leave your opponent helpless for multiple turns while you’d rack up damage and paralyse with Triple Poison and Wrap GX.
Celebi Prism Star

An interesting card, in that it provided a twist on Celebi’s usual evolution antics by allowing you to devolve your own Pokémon to reuse coming into play abilities. However, this same affect could be done through item cards, in Devolution Spray Z and Scoop Up Net, which allow you to use your attack for damage rather than just an effect on your own Pokémon.
Grovyle

While Sunshine Grace was always a strong ability, the fact that it was exclusive to a Stage 1 Pokémon inherently meant that it was less likely to see play. Searching out evolutions to use with Rare Candy or more basics to evolve on future turns was always strong, but that didn’t stop Grovyle from seeing minimal play outside of Sceptile GX decks.
Sceptile GX

Speaking of Sceptile GX, this Pokémon could set up some nice 2HKO on opponents with Leaf Cyclone, moving energy to another attacker which was being set up, before finishing them off with a Mach Cut. Jungle Heal GX was also another powerful attack and could be extremely effective if used on other GX Pokémon.
Dustox

Although it never saw serious play, Dustox’s Hazardous Evolution was always powerful in combination with Devolution Spray Z, which could see you paralyze opponents multiple turns in a row while racking up 30 damage in between turns with poison, as well as whatever damage you were doing with your attack.
Shaymin

Played in two tanking Grass archetypes, Celesaur and Eggrow, Shaymin could provide some phenomenal healing if you managed to get a few onto the bench, in combination with Life Forest Prism Star, meaning that you could heal over 100 damage in a single turn without playing a single Item or Supporter card. And then Welder came along…
Virizion GX

The final significant Grass Pokémon from this set, Virizion GX saw play primarily for Breeze Away GX, where it saw play with two walling archetypes, Vileplume and Obstagoon. In both of these decks, Virizion would scoop up all Pokémon in play, bar those with the basic-hating abilities, meaning that players could pass their way to victory if their opponent had no answer to them.
Typhlosion

Blazing Energy was always a cool ability (which had an even cooler animation on PTCGO!) that was only ever taken advantage of with one card, the Centickorch from Sword and Shield. It could mill a massive amount of card thanks to Typhlosion and Porygon Z working together to create a lot of Fire type Special Energy but was sadly never more than a rouge archetype thanks to its need to set up two Stage 2 Pokémon.
Magcargo GX

The great thing about Magcargo GX was its versatility. It was played as its own deck in combination with the Magcargo from Celestial Storm to take advantage of Crushing Charge to up Lava Flow, it was a tech in Mill decks so it could finish off games with Burning Magma GX and it was a key piece in Welder Mewtwo which made use of both if it’s attacks. Magcargo GX was a really well-balanced card, and it will be greatly missed by many.
Blacephalon GX

Onto a card will also be missed, Blacephalon GX first paired up with Charging Up Naganadel to deal massive damage thanks to its ability to accelerate multiple energy cards in a turn. It then moved into Baby Blacephalon for its Burst GX attack which could quicky finish of games where you otherwise might not have enough resources to take another knockout.
White Kyurem

An interesting one prize option, White Kyurem could deal great damage for a somewhat awkward attack cost, but as it happens it saw play thanks to Field Crush in Regigigas Hoopa stall decks as well as its own deck.
Mareep

One of those rare cards that could inflict instant status conditions, Mareep was firstly seen in Breloom Froslass decks where it could guarantee your opponent would be asleep before hitting with Breloom. However, more recently, it saw the vast majority of its play in mill decks, where it could take advantage of Slumbering Forest to keep your opponent asleep (unless they flipped double heads between the right turn) while you continued to mill their deck.
Zebstrika

Another rarity in the form of a draw engine, Zebstrika, saw play with a number of aggressive single prize decks such as Granbull, Zapdos and Excadrill, all of which loved digging through the deck as fast as possible to find the next combo piece. While we still have Cinccino, it pales in comparison to the power that Zebstrika could bring to a deck.
Zeraora GX

One of the bigger losses from this set Zeraora GX was key in Pikarom so that its attackers could quickly pivot into each other, especially at the start of a match if you were able to pull off that illustrious Full Blitz on your first turn. Plasma Fists was also a handy attack in the deck for dealing with Dedenne GX, while Full Voltage GX was especially for archetypes built around powering up Boltund V.
Unown

One of two playable Unown’s from this set, Unown Damage saw play in stall archetypes as a possible win condition if you managed to rack up enough damage on you board with your tanky defensive walls.
Unown

The more complex of the Unowns, Hand also saw play in stalling decks as you looked to rack up a massive hand size over the course of a game. It was also the centre of an entire deck which took advantage of Salazzle and Zacian V to draw a lot of cards in a turn. You just had to watch out for Marnie…
Wobbuffet

An anti-Prism Star card, Wobbuffet was primarily played as a tech to stop the likes of Diancie, Ditto Tapu Koko and Victini Prism Star, all of which were vital for either early or late game pushes, depending on the deck.
Girafarig

What made Get Lost such a good attack was that it had a colourless cost, meaning that it saw play in any and all control decks. Girafarig could send important Supporters, Pokémon or even Energy to the lost zone so that the opponent couldn’t use them for the rest of the game, punishing early discards of important resources with the like of Dedenne GX or Professor’s Research.
Shedinja

As soon as a card like this is revealed, players begin speculating what kind of decks they can create and what kind of annoying Pokémon they can keep in the active that won’t give up any prize cards. As it so happened, the cards of choice where Resource Management Oranguru, which could recycle your Shedinja pieces back into the deck, or the aforementioned Girafarig, which could send your opponents used cards into the Lost Zone.
Giratina

The final card from this first look a Lost Thunder, Giratina was best friends with Malamar for many, many formats. Its Distortion Door ability meant it could be recycled over and over again and continue to use Shadow Impact without suffering from the condition of placing damage counters, since they could be placed on Giratina with no consequence as it would likely be knocked out in return.
Sigilyph GX

Sigilyph GX’s Mirror Counter ability always had potential to deal massive damage without using an attack. However, thanks to its lightning weakness, it could be teched into PikaRom as a way to deal massive OHKOs to the TagTeam Pokémon. If a PikaRom hit into Sigilyph with either Full Blitz or Tag Bolt, both Pokémon would be knocked out, with a favourable prize trade for the defending player, who can then attack again in their turn.
Nihilego

Thanks to Nightcap’s single energy attack cost, and with access to both Beast Energy and Rainbow Energy, Nihilego was able to be played in a variety of decks. From Zapdos to Beast Box and Malamar to Spiritomb, what single prize decks excel most at is upscaling opponent on prize trades. Being able to copy any attack from an opponents Pokémon lead to some serious damage, taking into account the damage that could be dealt by GX attacks and from TagTeams.
Naganadel

Although Naganadel could only accelerate energy to itself, it found a home in two archetypes that relied upon getting as much energy into play as possible. With Quagsire, it could accelerate energy into play (along with Aqua Patch before it rotated) which could then be moved to the active for Pokémon with high energy attack costs, or single prize attackers that could be cycled easily. With Blacephalon GX, an archetype that Shintaro Ito took to the 2019 World Championships, it could get energy from the discard pile, in combination with Beast Ring accelerating energy from the deck, to take massive OHKOs by sending all the energy to the lost zone.
Onix

Another card that was paired with Quagsire, Onix also saw play in Malamar as a single prize beatstick that could OHKO both Zoroark GX and PikaRom. Its colourless attack cost meant that it could easily be included into any deck that accelerated a lot of energy, and the fact that it was a basic meant you could spring it upon your opponent at almost any time.
Alolan Meowth

Alolan Meowth was more than just a launchpad for any Alolan Persian Gas that were included in decks, it could actually win you the game if you went second and your opponent started only with Jirachi or other lowly basic. As we also saw briefly in Japan, it could also have been played in Eternatus.
Genesect GX

Although Double Drive was an interesting ability, the rest of Genesect GX’s attacks meant that it could never be justified building a deck around. The few times it did see play, it was never as an attacker, more so a bulky wall thanks to Metal Frying Pan.
Alolan Ninetales GX

A card that was greatly hyped before and upon its release, Mysterious Guidance allowed for powerful tutoring of important items. In addition to the usual ball search cards, Alolan Ninetales was paired with Decidueye GX and Gardevoir GX to make the Rare Candy/Stage 2 combo on turn 2 a lot more consistent, as well as Buzzwole GX in order to find Beast Rings on the desired turns. With an ability that good, it was unsurprising that Alolan Ninetales GX was often just played with the best cards in the format, such as Zoroark GX and Lycanroc GX.
Granbull

Having the honour of being the last great Fairy deck, Granbull gained popularity thanks to its All Out attack being able to knock out most one prize Pokémon, any basic GX and ADP for only one attachment. Needing to have an empty hand by the time you attacked, Granbull was played with very few draw Supporters and relied mainly on item cards and Magcargo to put an important card on top of the deck for the following turn.
Xerneas Prism Star

Thanks to its Santuary GX attack, Xerneas GX paired perfectly with Gardvoir & Sylveon GX. As an archetype built around healing and moving energy off damaged attackers, Gardeon’s natural bulk meant that you could turn the tides of a game in a single turn. Being able to take a big OHKO whilst also resetting all the damage on your board was often a devastating blow.
Mimikyu GX

Just like all of its regular cards throughout the SUM, Mimikyu GX had interesting attacks that could be utilised in a variety of decks and matchups. The simply brilliantly named Let’s Snuggle and Fall could deal massive damage to already damaged TagTeams and other high HP Pokémon, whilst Dream Fear GX could help out Gardeon in the unfavourable Reshizard matchup, by putting a four energy Reshizard back into the deck.
Tapu Lele

Confusion, combined with the blocking nature of the different Fairy Charms, could become a powerful and annoying addition for Fairy decks. In addition, Magearna from Ultra Prism combined with Tapu Lele could allow you to confuse your opponents active Pokémon every turn, which could buy yourself a lot of turns if your opponent could switch out of confusion or couldn’t flip enough heads to attack through the condition.
Blissey

While coin flip attacks have the potential to be some of the most fun, they can never be competitively viable unless their is a way to reflip coins. Thankfully for Blissey, it had access to two (the second albeit very briefly) cards that enable you to reflip coins. The primary partner, being Victory Star Victini, enabled Blissey to deal massive damage, in part thanks to the variety of energy acceleration available to it such as Welder, Double Colourless Energy/Twin Energy and Triple Acceleration Energy.
Ditto Prism Star

Ditto Prism Star was, quite frankly, one of the best cards ever printed because of the creativity, flexibility and consistency all players benefitted from. All of a sudden, Stage 1 Pokémon could start being teched into decks, allowing for more creative strategies across matchups. Decks that played multiple evolution lines became more consistent at setting up. Quite frankly, if you played evolution Pokémon, you pretty much always played Ditto Prism Star.
Lugia GX

Featured in a variety of decks such as Stall, Green’s Reshizarrd and Gardeon, Lugia GX’s Lost Purge GX attack could be used to eliminate a powerful threat (and potentially a lot of energy) from an opponents board. This could often put your opponent back numerous turns, allowing you enough time to race ahead in prizes or deck your opponent as they try to set up another attacker.
Trumbeak

Another combo piece of the Lost March deck, a full Trumbeak line provided an additional 80 damage, whilst also potentially disrupting your opponent by putting a draw Supporter in the Lost Zone. Since you could also play Trumbeak directly from your hand, there was no need to play a basic to evolve into, allowing for more space in the deck for consistency.
Adventure Bag

Included mostly in single prize decks, Adventure Bag meant that damage mods such as Spell Tag or Choice Band, switch outs such as Escape Board and prize manipulation such as Beast Bringer could be tutored out without having to wait to draw into them.
Choice Helmet

Despite not being in format when Choice Helmet was released, this tool card was almost exclusively played in TagTeam decks. With their high HP, this card was suited to Greens Exploration decks (ADP and Reshizard), tanking archetypes (Celesaur and Gardeon), and PikaRom. In a format with plenty of three prize Pokémon, being able to survive an extra hit compared to your opponent became an increasingly important factor.
Counter Gain

Thanks to a colourless reduction, Counter Gain could be included in a variety of decks. The types of decks that benefitted most from this comeback tool were evolving decks, and decks that relied on more than one type of energy. Counter Gain most saw play Zoroark variants, ADP Keldeo, TinaChomp and Obstagoon.
Custom Catcher

Custom Catcher was an interesting but ultimately flawed card, that only really saw play because of the drought of gusting options that was present in the late SUM/early SWSH era. Counter Catcher, Ninetales from Team Up and Great Catcher were all conditional gust and, leaving Custom Catcher as the only universal option that could go in the most decks. In Greens decks, Custom Catcher could at lead be tutored, but in most decks you had to draw into the two card combo. If you had to discard one early on, or if one was prized, you had even lower odds of even being able to pull off the combo once. It says a lot that, once Sword and Shield released, a full count Pokémon Catcher was instantly included in ADP.
Electropower

Electropower was, quite frankly, one of the strongest Item cards ever printed. Professor Kukui, a Supporter card, allowed you to do twenty extra damage in a turn. Now, imagine you can do 6x that amount of damage. Oh, and you can also use a Supporter for turn as well. Electropower became a must include in any lightning deck, allowing you secure knockouts when you had absolutely no right to. If we ever see a card like this ever again, that type is sure to be one of the strongest in the TCG.
Faba

Faba was that staple ‘one of’ Supporter that was included for that one card that could be problematic to your strategy. However, in terms of Stall and Control decks, Faba could be brought back over and over again with Lusamine and Oranguru, in order to remove large amounts of energy or tools that enabled retreating.
Fairy Charms (various)


The first four of the Fairy Charms, these could completely block some of the most powerful attackers in the format. Two of the most affected cards were Mew3 and ADP, and gave decks such as Gardeon an extra tool thanks to its Greens engine, meaning that different Fairy Charms could be easily accessed in whatever matchup they were required in.
Heat Factory Prism Star

Heat Factory was a powerful card not only because of the three additional cards you could draw per turn, but because of the synergy it had with the other support that fire had. Fire Crystal allowed you to recover three fire energies to your hand, essentially meaning that Heat Factory’s draw was essentially free. Additionally, since most fire decks only played Welder as their form of draw Supporter, Heat Factory made it easier to draw into the Welder/fire energy combo more often, as well as any Pokémon or items needed.
Life Forest Prism Star

When a Stadium card has an effect as good as a Supporter (Pokémon Centre Lady), you know it will see play. Thankfully for grass types, the archetypes that saw the most play were tanky/wall decks that made the most of the healing and damage reduction that was available, such as Vileplume, Celesaur and the first editions of Eggrow.
Lost Blender

The final piece of the Lost March puzzle, Lost Blender could put two extra Pokémon in the lost zone, resulting in an extra 40 damage, and up to 160 if you could get maximum value out of all 4 copies. Lost Blender also saw saw some play in Granbull, where it could easily get evolution Pokémon or Supporters out of your hand if you were unable to do otherwise.
Lusamine Prism Star

A very conditional but also very powerful Supporter, Lusamine Prism Star could give you that extra turn you needed to set up your attackers for a big OHKO, as the Ultra Beasts that this card saw the most play with were Blacephalon and Blacephalon GX, both of which required time to set up but could also be very deadly once once they had done so.
Mixed Herbs

Mixed Herbs provided greater healing than many of the other item-based healing cards, but at the price of having to have two in hand at once. Luckily for Green’s Reshizard, the deck in which this card saw the most play, Green’s Exploration could tutor on or both of these pieces at once, ensuring that you could heal pretty much whenever you needed to. Mixed Herbs also saw play in some of the other tank TagTeam decks, such as Celesaur, Gardeon and LucMetal.
Net Ball

Type specific ball search cards are guaranteed to go in all decks that it possibly can, with Net Ball replacing Nest Ball as the basic ball search of choice. The fact that you put the Pokémon in your hand meant that it could be an extra out to Pokémon Communication, and the option to also search an energy meant that it was much easier to get off an attachment for turn.
Professor Elm’s Lecture

Professor Elm’s Lecture was an absolute dream for evolving decks, Zoroark GX in particular. The sheer amount and variety of Zoroark variants meant that this card was very often the turn one Supporter of choice. Later on in its life, Professor Elm’s Lecture was also vital for the set up of Pidgeotto Control to ensure that the draw engine of the deck could be online from turn two.
Sightseer

Sightseer was a creative Supporter that was used in a creative way. The Blacephalon GX archetype needed to get fire energy in the discard pile so it could be recovered with Naganadel’s Charging Up ability. Sightseer meant that you could discard these energy cards, and then draw back up into a larger hand with either more energies or Pokémon to put into play.
Spell Tag

Spell Tag was the sort of card that you loved if you were playing it, and loathed if you were playing against it. As a staple in all Malamar decks, Spell Tag could give you that extra damage needed to KOs, with the potential to take multiple at once. In combination with Distortion Door Giratina, CEC Blacephalon, Espeon & Deoxys GX and even Cramorant V, Malamar players had plenty of tools to spread damage around the board effectively.
Thunder Mountain Prism Star

While this wasn’t the first Stadium card ever printed that reduced damage costs, Thunder Mountain’s effect was deemed so strong that you were only allowed to play one in your deck. However, that didn’t matter, and like with Electropower this was an instant include in any lightning deck. Of course, this card because a key piece in PikaRom’s turn 1 Full Blitz combo which, if pulled off successfully, was one of the most powerful combos in the entire format.
Wait and See Hammer

Unsurprisingly, Wait and See Hammer would have never seen play if it weren’t for Green’s Exploration. The ability to tutor out a guaranteed energy removal meant that you could put your opponent back a turn even though they had gone first. All sorts of Greens variants played this card, including Gardeon, TinaChomp, Reshizard and PikaRom, which goes to show just how powerful energy removal can be.
Memory Energy

While not a new effect, Memory Energy meant that you could copy attacks from any previous evolutions and power up your attackers at the same time. Its colourless cost meant that it could be splashed in a variety of decks, accessing potential strong attacks that were much more effective when used by a Pokémon with higher HP.